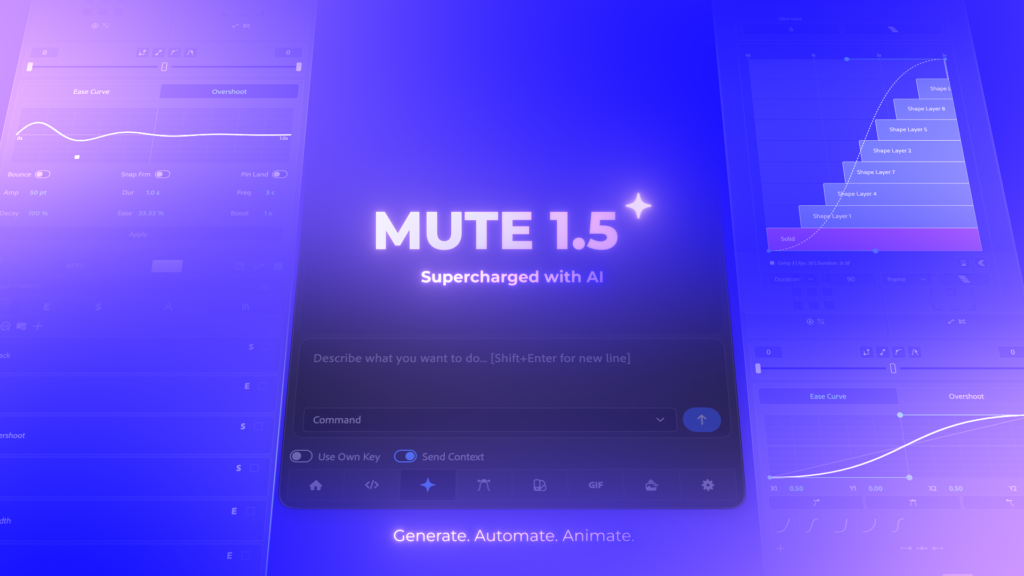
mute email poster

Mute

1.4.0

Motion Utility Extension

Mute is a Motion Utility Extension for After Effects to enhance your animation workflow with a suite of powerful tools.
*Free version includes basic version of Expression Preset Manager, Null Module, Anchor Module, Basic Key Module, and Layer Module.

Only Media Library available for Ps, Ill, and PrPro.

Ultimate Motion Utility Extension

Enhance Your Workflow with Mute's Multifunctional Magic!

Split Text

Split the text the way you want

Expand Shape

Split, Merge, and Customize Shape Layers Effortlessly

Shift Layers

Randomize, Align, and Perfect Your Animations.

Modify Stroke

Swiftly Alter Stroke Cap, Join, and Alignment.

Keyframe Organizer

Effortlessly Arrange and Align Keyframes

Dynamic Text Box

Create Shapes that Adapt to Your Texts

Crafted for You,

Powered by You

Mute’s subscription model, backed by patrons like you, fuels my ability to deliver ongoing updates while maintaining an affordable price point. Your support is what empowers me, as an independent developer, to keep bringing you new features and enhancements.

Floating License

Your Mute license key is mobile. Sign out on one computer and sign in on another, you will have access to all your cloud presets wherever you work.

Regular Update

Mute is regularly updated to enhance your workflow with new, clutter-free tools.

Cost Effective

Enjoy a cost-effective subscription that provides access to a wide range of tools, saving you from buying them individually.

Support

Whether you're facing installation difficulties or subscription issues, simply drop an email.

Share Your Ideas

Got a great idea for a Mute tool or want to suggest an improvement? Don't hesitate to reach out. Let's build the Mute community together!

Made with Passion

Mute is crafted with passion to enable you to focus on creating what you love most.

Release Note

V 1.4.0 Latest

*Only Media Library available for Photoshop, Illustrator, and PremierPro.

Mographfactory

© Copyright 2023 | Privacy Policy
Anchor Align
Select layers and click on desired Anchor align button to modify anchor. If “Lock Anchor” button is active, layer align itself to the anchor point. Activate “Ignore Mask” to ignore any applied mask on the layers.
Options
Null Generator
Choose your layers and click on any of the Null Anchors to generate a linked Null. If you hold down the Alt or Option key while doing this, it will create a 3D connected Null.
When you activate ‘Layer Parent,’ it will create connected Null layers for each individual layer, along with a master Null that connects all the newly created Null layers.
When you activate ‘Preserve Parent,’ it will disregard any layers that are already connected and instead create a Null layer that connects all the unconnected layers.
Options
Ease Slider
Select the desired keyframes and adjust the slider to modify the ease out and ease in influence of the keyframes. Activate “Lock Slider” to adjust the in and out influence equally.
Options
Ease Curve
Select your desired keyframes and adjust the bezier curve to fine-tune ease in and ease out effects. Apply changes by clicking ‘Apply Ease Out’ for ease out adjustments, ‘Apply Ease In’ for ease in adjustments, or ‘Apply Easy Ease’ to modify both ease in and ease out for the selected keyframes.
To create a new preset, click the plus icon, adjust the bezier curve, give your preset a name, and click ‘Save.’ You can choose to save it locally or in the cloud by toggling between the options. If you want the preset to appear on the home screen for quick access, be sure to select the ‘Add to Home’ button.
To read ease keyframe data, click on a keyframe, then choose ‘Read Ease Out,’ ‘Read Ease In,’ or ‘Read Easy Ease. If you have multiple keyframes selected, this will provide the average of ease in, ease out, or both values.
“Copy to Clipboard” will copy the bezier curve data to the clipboard as comma separated value.
Options
Ease Library
When you first open the Ease Library, you’ll be prompted to install Default Presets. To create your own custom presets, click the ‘Add’ button, adjust the bezier curve as needed, provide a name, and save. You can opt to save the preset locally or in the cloud. To access presets on the home screen, click on the ‘Home’ icon of the presets.
Options
Color Palette
To create a new Color Palette, click on the ‘Add’ icon. Add colors to the palette, provide a name, and save it. You can add colors using various methods such as the box picker, wheel picker, universal color picker, hex code input, or by importing an ASE file or image.
To apply a color, select the layer and click on the swatch. You can switch between stroke or fill to apply to either the stroke or fill individually. Alternatively, select both to apply the color to both the stroke and fill.
Options
Palette Library
To create a new palette in palette library, click on ‘Add’ button. You can pick colors using the Box or Wheel picker, use the universal picker to select colors from anywhere on your desktop, enter a Hex code, or import an ASE file. You can also bring in an image or paste an image link to extract colors. Make sure the image link ends with a common image extension like .png, .jpg, .gif, or .svg.
To apply a color, select the layer and click on the swatch. You can switch between stroke or fill to apply to either the stroke or fill individually. Alternatively, select both to apply the color to both the stroke and fill.
Options
Layer Organizer
For randomizing layer shifts, select your desired layers, input the Min Value (Frame/Sec) and Max Value (Frame/Sec), and then click the ‘Randomize’ button. Your layers will then shift randomly between the Min and Max Values, starting from their In-Point.

For layer arrangement, choose your layers, provide the Offset Value (Frame/Sec), and click the ‘Arrange’ button. Select layers from bottom to top for an ascending arrangement or top to bottom for a descending arrangement.
Options
Text Split
You have the flexibility to split text by ‘Characters,’ ‘Words,’ ‘Lines,’ or using a ‘Custom Word or Characters’. Simply select the text layer, pick your preferred split method, and click the ‘Split’ button. If you wish to convert box text to point text during the split operation, activate the ‘Convert Box Text to Point Text’ option.
Options
Stroke Modifier
Easily adjust multiple stroke properties across various shape layers simultaneously. Just select your shapes and click on different stroke modifiers. These include enabling and disabling stroke, changing stroke cap between Butt, Round, and Projecting, modifying stroke join between Miter, Round, and Bevel Join, and adjusting stroke alignment between Center, Outside, and Inside. Additionally, you can enable or disable ‘Maintain Stroke Width,’ ensuring that the stroke always maintains its width when scaling the shape layer.
Options
Key Organizer
you can quickly align and reposition keyframes for multiple layers using Key Organizer. You can either align them with the layer’s in-point and out point or with the timeline cursor.
Options
Key Cloner
With Key Cloner, easily clone or reverse clone selected keyframes. Simply choose the keyframes you wish to clone and click either “Clone Selected Keyframes” or “Reverse Clone Selected Keyframes”.
Options
Expand Shape
To split a complex shape layer into individual ones, select the shape layer and click ‘Expand.’ You can also merge multiple shape layers into a single one by selecting a bunch of shape layers and hitting the ‘Combine’ button. Easily convert vector files to shape layers and remove artboard artifacts with a single click. Create perfect circles or squares quickly with the circle and square tool.
Options
Bounding Mask & Dynamic Text Box
To create a mask with a specific offset value, select a text layer, input the offset value, and then click ‘Create Bounding Mask.’ Alternatively, you can create a bounding shape by clicking ‘Create Bounding Shape.’ For a dynamic text box, simply click ‘Create Dynamic Text Box.’ You can fine-tune the padding offset in the ‘Effects Control’ of the newly created text box shape layer.
Options
Project Organizer
Tidy up your cluttered projects with Project Organizer in just one click. Select the items you don’t want to include in the organized structure, and click the “Organize Project” button. To customize the folder structure’s name, navigate to settings and make changes in the “Organizer” tab.
Settings
GIF Maker
GIF Maker simplifies the process of exporting compositions to GIFs. Just pick your compositions, add them to Mute, select a render template, adjust GIF export settings, choose the export directory, and click ‘Create.’ Additionally, you can directly import external video files into Mute and export GIFs without the need to create a composition. Select a render template that can export videos with transparency to create GIFs with transparency.
Note
The Render Template is a pre-existing After Effects render template that you’ve previously saved. Mute utilizes these template to render compositions before converting them into GIFs.
Expression Presets
To create a new Expression Preset, go to the ‘Expression/Script’ library and click the ‘Add’ button. Give your Preset a name, add your expression, and provide some details for future reference. Then hit the ‘Add’ button. You can save your presets on your local library or in the cloud. Now, in your preset library, you’ll find your newly created Expression preset.
To apply the expression presets, select one or more properties and double-click the preset.
Options
Runtime Variables
Runtime variables enable you to adjust data in your expression or script presets while applying the expression or running the scripts.

For instance, you can create runtime variables for parameters such as wiggle frequency and amplitude. When you apply the wiggle to a property, a prompt window will appear, allowing you to modify the frequency and amplitude as needed.
To create runtime variables, click on ‘Add Variables.’ This will open a prompt to set up your variables. There are four options:

  • ‘Display Name’ is the label for your variables.
  • ‘Variable Name’ is the actual variable you’ll refer to in your expression or script. It must match exactly when referencing it.
  • ‘Variable Type’ refers to the kind of variable you want to create. There are three types available: ‘String’ (text), ‘Boolean’ (true/false), and ‘Number.’
  • ‘Variable Value’ is the default value of the variable.
Now, go ahead and create your expression, but instead of hard-coding the values, use the variable names you’ve set up.
To apply the expression presets, select one or more properties and double-click the preset. It will then prompt you for the user inputs for the variables you’ve set.
Options
Grab Expression
Utilize ‘Grab’ to capture expression data from any property and save it as presets. To grab, simply select the property with the expression and click on the ‘Grab’ button. It will open the ‘Add Expression’ window with the expression data auto-filled from the selected property.
Options
Script Presets
To create a new Script Preset, head to the ‘Expression/Script’ library and click the ‘Add’ button. Provide a name for your Preset, write your script, and include some details for future reference. You can also add a runtime variable for your script. Then, click the ‘Add’ button. You have the option to save your presets in your local library or in the cloud.

Now, in your preset library, you’ll discover your freshly created Script.
To run the script just double-click on the script preset.
Options
Expression Inspector
With Inspector, you can quickly inspect, update, modify, enable, disable, delete, and resolve errors in expressions throughout your project. To access it, go to the ‘Expression/Script’ panel and click on ‘Inspector’ to open the Inspector window. You can retrieve expression details from selected layers, compositions, and across the entire project. Once you have the expression data, you can easily make bulk updates, modifications, enable or disable expressions, delete them, or resolve errors. Additionally, you can test any expression or script and save them as presets.
Options
Media Library
Find and download thousands of great photos and videos from popular free stock sites. Just search, pick what you like, select the quality, and easily import it into your project.
Provider
Vectors Library
Explore a rich collection of free illustrations by celebrated artists. Head to the Vectors tab in the Media Library, select the illustration, and double click to import it as shape layers or footage into your project, depending on your Adobe app.
Library
Icon Library
Easily grab and use thousands of icons and emojis from popular libraries. Just visit the Icon tab in the Media Library, double-click on what you want, and import it as shapes or footage into your project, depending on your Adobe app.
Library

V 1.4.0

Release: Aug 2023

Update

  • Major UI Update. Clean and more responsive UI
  • Moved Expression Inspector to Expression Script Panel

Added

  • Runtime Variables for Script and Expressions
  • Ease Curve Control
  • Support to import local files to create GIF

Fixed

  • Issue with GIF render Template

V 1.3.0

Release: June 2022

Update

  • Media Library – Included Vector Illustrations and Icons Library
  • User Interface Update

Added

  • Universal Color Eye Dropper

Fixed

  • Separated Project Organizer module from Bounding Mask module.

V 1.2.0

Release: Nov 2021

Added

  • Media Library – Support For After Effects, Illustrator, Photoshop, Premiere Pro
  • Option to save login credentials

Fixed

  • ASE file Import

V 1.1.0

Release: May 2021

Added

  • Text Split Module
  • Stroke Module
  • Dynamic Text Box Module
  • Option To Import Script

Fixed

  • User Interface Bug Fix

V 1.0.0

Release: Feb 2021

Initial Release

Slide into My Inbox: Let’s Talk Mute! ✌️