MUTE DOCUMENTATION

Getting Started

let’s start the Mute journey.

Mute is distributed as a signed ZXP package. We recommend using  Anastasiy Extension Manager to manage Mute easily. You can also use ZXP Installer

Anastasiy Extension Manager

  1. Download the ZIP package. and extract to a folder. You will find mute.zxp file.
  2. Open Anastasiy Extension Manager and select After Effects as your installation application.
  3. Click on the install button, and choose mute.zxp.
  4. You will get a confirmation on successful installation.
  5. Restart After Effects and you will find Mute in Window> Extension menu.

ZXP installer

  1. Download the ZIP package. and extract to a folder. You will find mute.zxp file.
  2. Open ZXP installer.
  3. Drag and drop mute.zxp.
  4. Restart After Effects and you will find Mute in Window> Extension menu.

Manual installation

In some case user may get an error in installation or face issue post installation due to incorrect folder permission. Most often this issue is resolved if Mute is installed manually.

Uninstall Mute if already installed. You can use https://install.anastasiy.com/ if you can’t find the mute folder in your adobe extension folder.

  1. Rename Mute-Vx.x.x.zxp to Mute-Vx.x.x.zip
  2. Double click on Mute-Vx.x.x.zip to extract
  3. Rename the extracted folder to com.mographfactory.mute
  4. Copy folder to extension folder  MAC: Library/Application Support/Adobe/CEP/extensions/  Windows: C:\Program Files (x86)\Common Files\Adobe\CEP\extensions
  5. Restart After Effects.
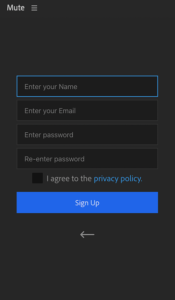
You will need to create a Mute account to use Mute.

  1. Click on the SignUp Button
  2. Fill the SignUp Form.
  3. Read and agree to the Terms & Conditions
  4. SignUp

Your Registered Email Id will be your Mute User ID

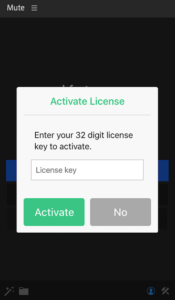
To access all features of Mute, you need to activate your license. You need to become a Patron to get your license key. Once you become a patron, you will receive an email from Gumroad with your 32 digit license Key.

Get License Key
  1. Click on the Activate License button.
  2. Enter your 32 digit License Key that you have received from Gumroad.
  3. Wait until you get activation confirmation.
  4. SignOut and SignIn to access all features of Mute.

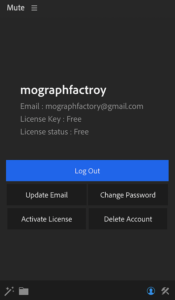
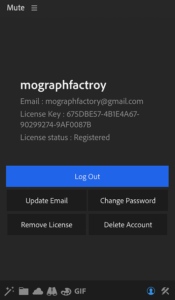
Update Email

Change your registered email id.

Change Password

Update your existing password

Activate License

Activate a new license key.

Remove License

Remove an existing registered license key. This does not cancel your subscription. You will keep being charged for the subscription as per your chosen frequency. To cancel your subscription, please go to the Gumroad account and cancel your subscription. Remove License simply remove the license from your mute account so you can register a new license key.

Delete Account

Deletes your Mute account and all your cloud data. This is an irreversible action. You will lose access to most of the mute features. This does not cancel your subscription. You will keep being charged for the subscription as per your chosen frequency. To cancel your subscription, please go to the Gumroad account and cancel your subscription.

Mute license is distributed through Gumroad. To upgrade or downgrade your subscription, you must cancel your existing subscription, and take a new subscription. Your new subscription will not be adjusted against your existing subscription. We highly recommend you to wait until your next renewal date before upgrading to downgrading your subscription. else you might be charged twice. However, on the cancelation of your subscription, your license key will be active until your next renewal date.

Post changing your subscription, remove the existing license key from the Mute account, and activate the new license key.

Please contact us at support@mographfactory.com as soon as possible if you run through any problem.

Mute license is distributed through Gumroad. To cancel your subscription, please visit your Gumroad account and cancel your subscription.

All Mute patron can download the new version of Mute from their Gumroad Account and the Free user can download from the Mute website.

  1. Download the new update from the Gumroad or Mute website.
  2. Sign out from your existing copy of your Mute Extension in After Effects and close the After Effects. (This is important for successful update). 
  3. Extract the Zip file and look for Mute-Vx.x.x.zxp file.
  4. If you are using ZXP Installer to install your extensions, just drag and drop Mute-Vx.x.x.zxp to the installer.
  5. If you are using Anastasiy Extension Manager, just select the After Effects option from the menu, you will find com.mographfactory.mute with the version info on the extension list. Select and remove it. Install the new version of Mute.
  6. Open After Effects and sign in again to Mute again to use the updated version.

Here are the solutions for some known issues people have experienced.

ISSUE 1:

The Mute opens up with a blank screen. Nothing happens.

SOLUTION:

First, try restarting the mute as well as the application. If that does not solve the issue, delete the “mute.pref” file from the Mute Data directory. Make sure you are not deleting any other files from the directory. “mute.pref” will be automatically created when you restart Mute.

Mute Pref Directory:

Windows:  C:\users\your-username\AppData\Roaming\mographfactory\Mute\
Mac:  /Users/your-username/Library/Application Support/mographfactory/Mute

ISSUE 2:

Security warning about  FFMPEG and Color Picker while GIF maker, or Using Color Eye dropper.

SOLUTION:

Mute use a third-party tool call FFMPEG to make GIF, it is a well-known and trusted program so you can safely allow FFMPEG to run. Mute also use the proprietory Color Picker program to bring eyedropper features. These are safe to run programs.

Just allow them from MAC “Security & Privacy > General > Allow apps downloaded from” section.

CREATOR

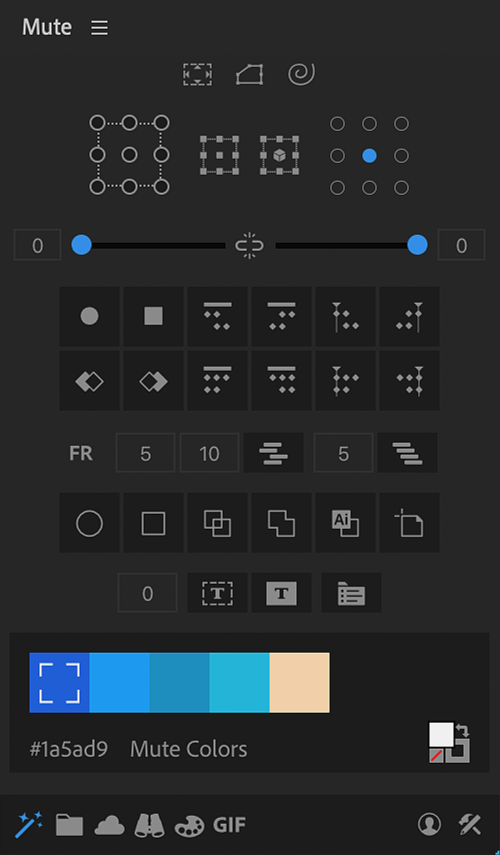
The creator screen is the default screen of MUTE. This screen has 10 modules, ie Null Module, Anchor Module, Easing Module, Key Module, Layer Module, Shape Module, Text bound Module, Quick Palette Module, Text Split Module (V1.1.0), and Stroke Module (V1.1.0).

Anchor Points

To change anchor point placement, Just select a layer or multiple layers and click on any of the 9 points of the Anchor Module. If layers are animated, it will adjust the animation according to the new anchor point. No changes occur to the animation or position of the layers.

Options:
Lock Anchor Point

This option allows you to lock the anchor point. If the lock anchor point is selected, the layer moves based on its anchor points.

Ignore Mask

This option allows you to ignore the mask of the layer while repositioning the anchor point. By default, repositioning anchor points considers layer masks, this may not be ideal for some cases like text layers. With the “Ignore Mask” option selected, repositioning the anchor point will ignore the layer mask, while moving the anchor point.

2D Null

Select a group of layers and Click on Null Icon to create parent null. This will parent all the layers with newly created null.

3D Null

Select a group of layers and Click on the 3D Null icon to create parent null. This will parent all the layers with newly created null.

Options:
SHIF + CLICk

By default click on the icon will create a parenting null. Hold Shift and click on the icon to create a layer parent null. This will create an individual null for each layer and make a group null to parent all null.

Preserve Parent

By default creating null will ignore all the existing layer parent and parent them with newly created null. If the Preserve parent is selected, all the existing layer parent will be preserved and the rest of the layers will be made the child to the newly created null.

Null Anchor

You can choose the anchor point for the new null by selecting any of the 9 points availble. For example, if the Top-Left corner is selected, the new null will have its anchor point set to the Top-Left corner.

Easing Module

Select a key or group of keys and adjust the slider to Ease In or Ease out animation. Optionally you can enter a value between 0 to 100 in the input area. 0 will remove any ease applied to the key.

Key Module

Key Module will help you to quickly manage your keyframes. There are 12 options to manipulate keyframes.

Rove Key

This is similar to the “Rove Across” option. Select a group of keys to convert them into Rove keys. This applies to only property that has 2D or 3D Spatial property type. Also, the property must have at least 3 keyframes. Example: Position property.

Hold Key

Select any key to convert them to a hold key. Cmd/Ctrl + Z to Undo.

Clone Key

Select a group of keys of a layer or multiple layers to clone them. This will preserve all the relational distance between keys across multiple layers and properties.

Reverse Clone Key

Select a group of keys of a layer or multiple layers to reverse clone them. This will preserve all the relational distance between keys across multiple layers and properties.

Move the first Key to Layer In Point

Select a group of keys of a layer or multiple layers to move to layer in point. This will move all the selected keys aligning the first key to the layer in point. This will maintain all the relational distance between keys. So only the first key of the selected keyframe group will move to its layer’s in point. The rest of the keys will move to keep the relational distance.

Move the Last Key to Layer Out Point

Select a group of keys of a layer or multiple layers to move to the layer out point. This will move all the selected keys aligning the last key to the layer out point. This will maintain all the relational distance between keys. So only the last key of the selected keyframe group will move to its layer’s out point. The rest of the keys will move to keep the relational distance.

Move the First Key to Current Time

Select a group of keys of a layer or multiple layers to move to the current time ie, where the player head is in the timeline. This will move all the selected keys aligning the first key to the current time. This will also maintain all the relational distance between keys. So only the first key of the selected keyframe group will move to the current time. The rest of the keys will move to keep the relational distance.

Move the last Key to Current Time

Select a group of keys of a layer or multiple layers to move to the current time ie, where the player head is in the timeline. This will move all the selected keys aligning the last key to the current time. This will also maintain all the relational distance between keys. So only the last key of the selected keyframe group will move to the current time. The rest of the keys will move to keep the relational distance.

Align first keys to layer in point

Select a group of keys of a layer or multiple layers to align them to the layer’s in point. This will move all the selected keys aligning the first key to individual layers in point. This will maintain the relational distance between keys of an individual property only.

Align last keys to layer out point

Select a group of keys of a layer or multiple layers to align them to the layer’s out point. This will move all the selected keys aligning the last key to the individual layer’s out point. This will maintain the relational distance between keys of an individual property only.

Align first keys to Current Time

Select a group of keys of a layer or multiple layers to align them to the current time ie, where the play head is in the timeline. This will move all the selected keys aligning the first key to the current time. This will maintain the relational distance between keys of an individual property only.

Align last keys to Current Time

Select a group of keys of a layer or multiple layers to align them to the current time ie, where the play head is in the timeline. This will move all the selected keys aligning the last key to the current time. This will maintain the relational distance between keys of an individual property only.

Layer Module

Randomize or organize a group of layers.

Randomize Layer

Quickly Randomize layer. Enter the min and maximum value that will be used to randomize layers and click the randomize layer button.


Arrange Layer

Similar to randomization, this will arrange the layers. Just enter a value that will be used to offset layers and click the icon. ie, with value 5, layers will be offset 5 frames from each other. The direction of the offset depends on the selection of the layers.


OPTIONS:

You can choose between frames and seconds for the Min, Max, and Offset value.

Shape Module

The shape module allows you to manage shape layers. There are 6 options to manage shape layers.

Create Circle

Quickly create a circle shape. Hold the Shift key to create a path.

Create Square

Quickly create a square shape. Hold the Shift key to create a path.

Expand Shape

Quickly expand shape group to an individual shape layer.

Combine Shape

Combine shape multiple shape layers into a single shape layer.

Convert vector to shape

Convert one or multiple vector layers (ai, eps, etc…) to shape layers.

Remove artboard

Sometimes when you import an Illustrator file and convert them to shape, you get Illustrator artboard bound layer. use the Remove Artboard option to remove them.

Text Bound Module

text bond module allows you to create a perfect mask or a shape box. You can enter an offset value to offset the mask or shape. For example, using a value of 0 will create a perfect mask or shape around the text, and value 10 will add 10px padding to the mask or shape. Please note this option can be used in other layer types too.

Create Bounding Mask

Create a bounding mask around a layer. Use offset value to add padding.

Create Bounding Shape

Create a bounding shape around a layer. Use offset value to add padding.

Create Dynamic Text Box (V1.1.0)

Create a self-adjusting dynamic text box. Just select a text layer and click on this icon. this will create a dynamic text box system. Use the Offset slider on the newly created shape layer to adjust the margin.

Organize Project

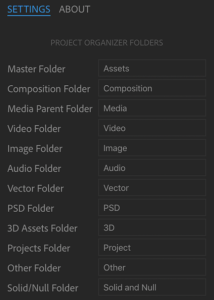
This is a special option to organize the project. Click on this icon to organize the project assets (comps, images, footages, etc.) to its predefined folders. Select any comp that you don’t want to be a part of the folder, this will skip the selected items and organize the rest of the assets to its predefined folder.

You can change the name of each predefined folder name in the setting.

Quick Palette Module

Quick Palette Module allows you to use your selected palette from the creator panel. You can click on any color to apply to the selected layers. You can use the Fill-Stroke module to change between stroke and fill while applying the colors.

Stroke Module

Stroke Module allows you to quickly change the Stroke Cap, Stroke Join, Stroke Alignments, Toggle Stroke, and Enable Maintain Stroke Width.

Enables Butt Cap (Shape)

Enables Projection Cap (Shape)

Enables Round Cap (Shape)

Enables Miter Join (Shape)

Enables Round Join (Shape)

Enables Bevel Join (Shape)

Align Stroke to Center (Shape).

Align Stroke to Outside (Shape)

Align Stroke to Inside (Shape)

Enables Stroke (Shape and Text)

Disable Stroke (Shape and Text)

Enable Maintain Stroke Width (Shape).

Allows you to scale shape without affecting the width of the shapes. Stroke width auto-adjust to the scale of the shape to maintain it’s original width.

Disable Maintain Stroke Width (Shape)

Stroke Slider:

Enables you to change the stroke width.(Shape and Text)

Text Split Module

Text Split Module allows you to split the text layer into multiple Characters, Words, Lines. You can also split the text layer based on a custom word or character. It works with point text as well as box text. you can choose to convert box text to point text while splitting the text layer. However, box text may not give the desired effects occasionally. We suggest you to convert box text to point text before splitting the text.

How to use: Just select text layers that you want to split. Choose split type option between “Characters”, “Words”, “Lines” or “Custom”. Enter a custom word or character if you have selected the “Custom” split type. And click the “Split Text” icon.

Make sure you have enabled “Convert box text to point text” if your text layer is box text and you and you want split texts to be point text.

Enable this to convert box text to point text while splitting the text layer. (Experimental)

Click this icon to start the split process.

PRESETS

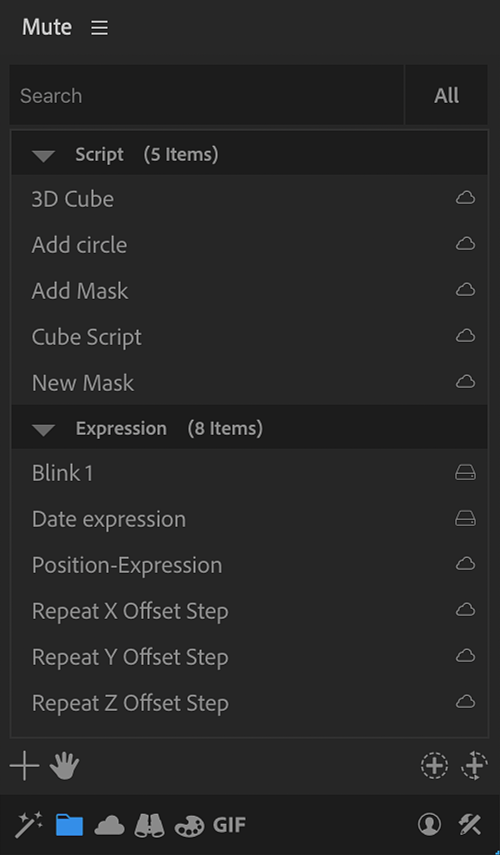
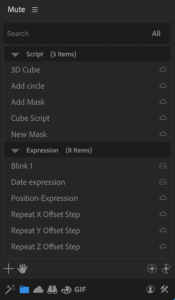
The preset screen allows you to save Expression and Script presets and apply them with a click. If you have used M Expression script, this is very similar to that with advanced options

Apply Expression

  1. Select a property or multiple properties and double click on one preset to apply an expression. This will ask for confirmation if an expression is applied to any of the selected property.
  2. Alt + DoubleClick will apply the expression to selected properties and replace them if an expression is already applied to a property.
  3. Shift + DoubleClick will apply the expression to selected properties and append it to the existing expression if any applied to the property.

Run Script

DoubleClick on any script preset to run.

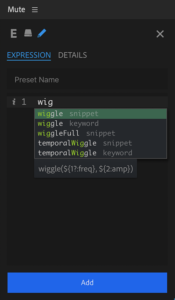
  1. Click on the + icon to add a new preset.
  2. Add a preset name.
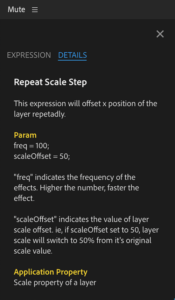
  3. Add an expression or script. Available Expression Snippets will be shown as you type the expression.
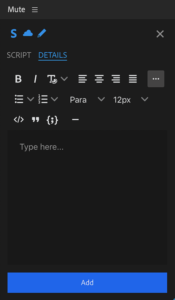
  4. Add details for the expression, ie what is this expression is for and how to use it so you can refer to it when you need it.
  5. Click the add button to add the preset.

Click on E or S icon to change between expression or script.

Click on the disk or cloud icon to create a local or cloud preset.

Click the pen icon to enable or disable editing.

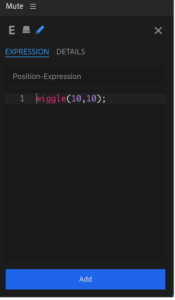
  1. Select any property with expression.
  2. Click on the grab icon (hand).
  3. Edit the name of the preset.
  4. . Add preset details.
  5. Click on the Add button.

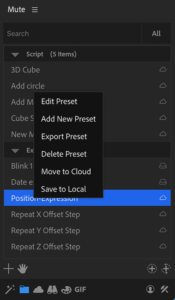
Right-click on the preset screen to open preset menus.

Edit Preset

Open Edit Preset modal. Click on the Pen icon on the modal to edit the preset. You can also save a preset as a new preset.

Add new Preset

Same as add preset option. This will open the Add Preset modal.

Export Preset

Select one or multiple preset to export.

Delete Preset

Deletes one or multiple selected preset

Move to Cloud

Moves selected local presets to your cloud library. Presets saved in the cloud library can be accessed on any machine you login.

Save to Local

Moves preset from cloud library to the local machine. Local presets can be accessed from the machine you save.

Import

Import exported presets.

Import Old Presets

If you are an M Expression user. You can import M expression presets with this option.


Import Script (V1.1.0)

You can import any jsx and jsxbin file directly to the library using the “Import Script” option. Just click the icon and choose jsx or jsxbin file to import. This works for most of the After Effects script (Some Script that required to install in the script UI panel, may not work).

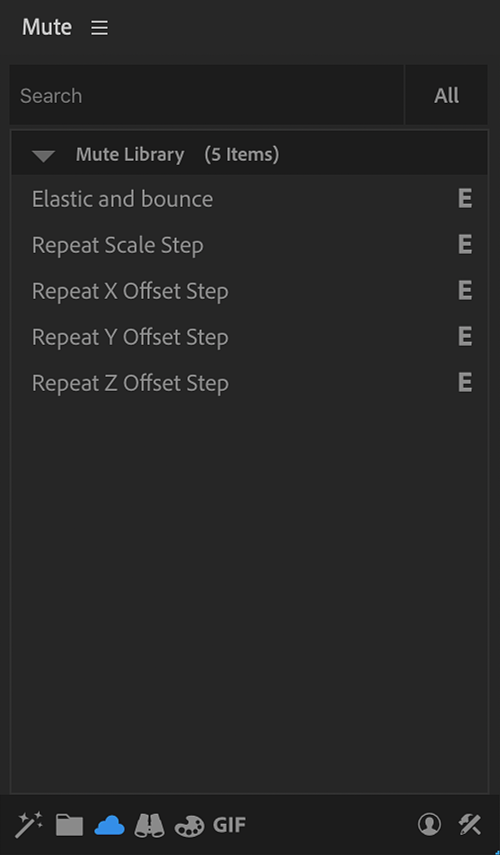
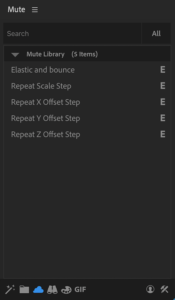
Mute Library

The Mute Library gives you quick access to the prebuilt Expressions and Script snippets. We will keep updating the list that you can have access to the expressions you want.

Apply Expression

  1. Select a property or multiple properties and double click on one preset to apply an expression. This will ask for confirmation if an expression is applied to any of the selected property.
  2. Alt + DoubleClick will apply the expression to selected properties and replace them if an expression is already applied to a property.
  3. Shift + DoubleClick will apply the expression to selected properties and append it to the existing expression if any applied to the property.

Run Script

DoubleClick on any script preset to run. Scripts are labeled with “S” on the right.

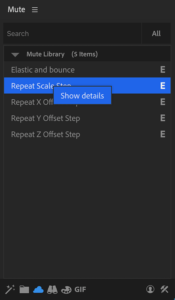
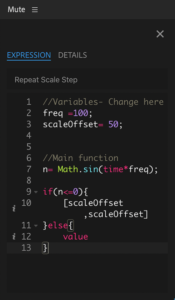
View preset Details

Select a preset and right-click to show details.

Inspector

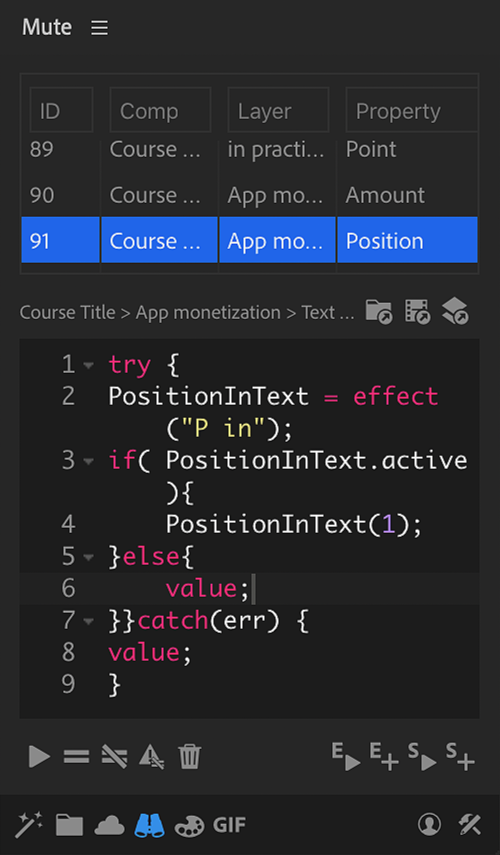
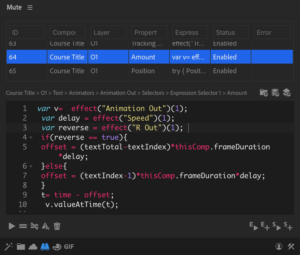
With the Inspector, you can inspect all the expressions from a project. Easily edit, delete or update the. You can quickly create and test a script.

Retrieve all the expressions from the project. This may take some time depending on the project.

Retrieve all the expressions from the active composition.

Retrieve all the expressions from the selected layers.

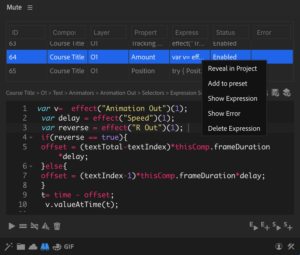
Reveal in Project

Open the composition and highlight the layer that has the selected expression applied.


Add to Preset

Opens the Add Preset Modal with selected expression pre-filled.


Show Expression

Quickly view the expression without adding them to the editor. You can also view the editor by double-clicking the expression. This will add the selected expression to the editor.


Show Error

Show the expression error if there is any.


Delete Expression

removes expression from the layer property.

Update selected Expressions

Updates all the selected expression from the list with the one in the editor. If the editor is empty, this will remove all the expressions selected.

Enable All

Enable all the expressions

Disable All

Disables all the expressions

Disable Error

Disables all the expressions with errors.

Remove All

Removes all the expressions. this can not be undone.

Apply Expression to selected properties

Apply expression on the editor to the selected layer properties.

Add Expression as preset

Opens Add Preset modal with prefilled with the expression from the editor.

Run Script

This will run any script written on the editor.

Add Script as preset

Opens Add Preset modal with prefilled with the script from the editor.

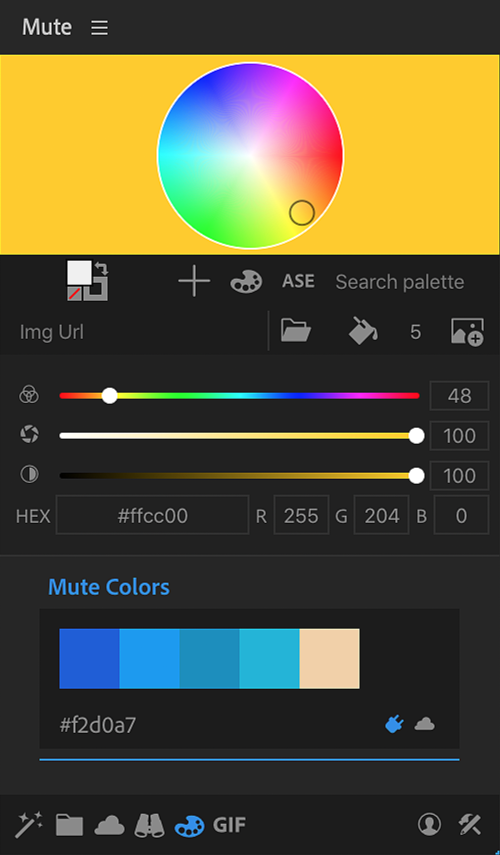
Color Palette

With the Color Palette, you can create a new palette, save them in your cloud account, create a palette from an image from the web or local machine.


Fill Stroke Module

Allows you to choose between Fill and Stroke.

If fill is selected, the color will be applied. For a comp or solid, a fill effect will be applied, for the Text and shape layer, the color will be applied to fill the property.

If the stroke is selected, it will have no effects on solid or comp, for the Text or Shape layer, the color will be applied to stroke property.

You can swap the fill and stroke for Shape or Text layer with the swap icon on the top right. For composition or solid, this will toggle the fill color if selected layers have  Mute-Fill applied.

You can also remove fill or stroke from Text or shape layers with Shift+Click on the Remove Fill Stroke icon on the bottom left.

Add New Palette

Creates a new palette with the color selected in the color wheel.

Add Color to the palette

Adds the selected color from the color wheel to the selected palette.

Import ASE Palette

Imports Adobe ASE color palette file and create a new palette.

Import or add an image URL from the web to create a palette from the image.

Get dominant Color

Gets the dominant color from the selected image. The color will be reflected in the color wheel.

Create Palette From Image

Creates a new color palette from the selected image. The number of colors on the palette will be determined by the value entered in the input field.

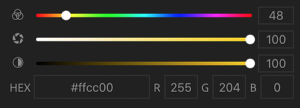
Apart from the color wheel, You can also use Hue, Saturation, or Brightness slider to adjust the color. You can use Hex, Red, Green, Blue input to get a specific color.

Apply Color

Select any layer or multiple layers, and click on any color to apply. Property to apply will be determined by the selected option un Fill Stroke Module.

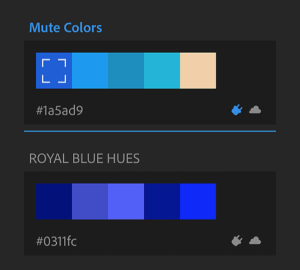
The plug icon is used to select the palette to show on the creator screen.

The Cloud and Drive icon indicates the location of the palette.

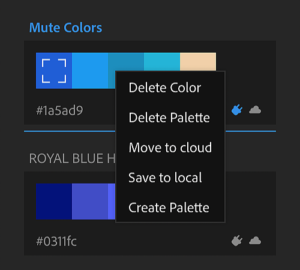
Delete Color

The selected color will be removed from the selected palette.

Delete Palette

The selected palette will be removed. You can select multiple palettes holding Shift Key.

Move to Cloud

Selected palettes will be moved to your Mute clod account. Palettes saved in the cloud can be accessed from any machine you log in.

Save to Local

The selected cloud palette will be saved to the local machine and will be removed from the cloud. These palettes can only be accessed from the machine it was saved.

Create Palette

Creates a new palette with the color selected in the color wheel.

GIF MAKER

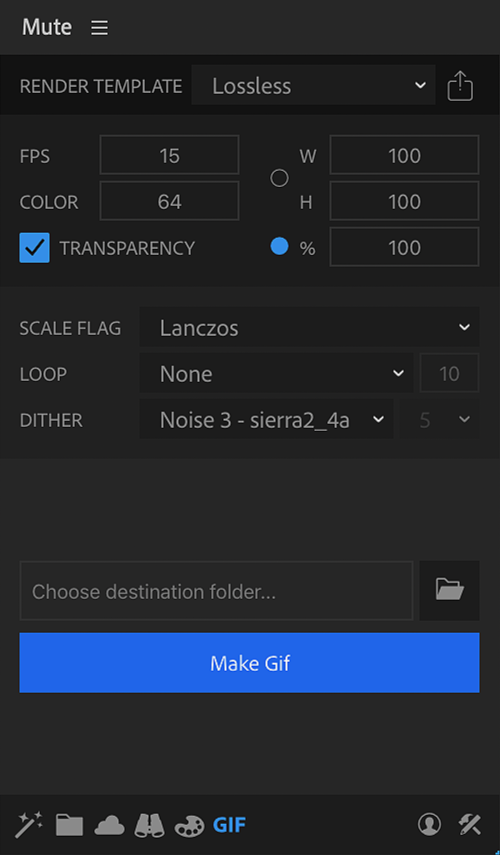
With GIF Maker, you can make GIF from your selected composition right from the After-Effects.
  1. Select the compositions you want to make GIF,
  2. Select a Render Template. Choose a render template that renders video with transparency if you want your GIF to have transparency.
  3. Choose your desired GIF settings.
  4. Choose a destination path.
  5. Click ‘Make Gif’ button.

Render Template

Gif maker needs a render template to make a gif. This is one of your After Effects render templates. This must be a video render template that outputs .mov, .avi etc. Mute will automatically search for existing render templates. If you do not have any render template set in After Effects first make a render template. If you need your GIF to have transparency, your render template should be able to render out a video with transparency.

Get Render Template

If you added a new render template after Mute initialized for the first time, you need to re-initialize the render module to make the new template available for use.

FPS

Choose the desired FPS for your GIF. This must be a non-zero value.

Size (W/H – %)

You can set Width and Height using W/H value or use percentage value to preserve the aspect ratio.

Color

The number of colors to use to create GIF. This value must be between 1 and 256.

Transparency

Check to enable GIF transparency. You must choose the correct render template to render a transparent GIF.

Scale Flag

Scale Flag determines the scale quality of a GIF. this affects the quality of the GIF. The correct option depends on the animation you are trying to render. You can experiment with this to find the correct one for your GIF.

Loop

Set the number of the loop you want to have.  You can choose between Infinite, None or you can set a custom number.

Dither (Noise)

Choose the Dither type. This affects the GIF quality. If you choose Pattern type, you need to set a pattern size. Higher the number, smaller the pattern size.

muteMediaLibrary

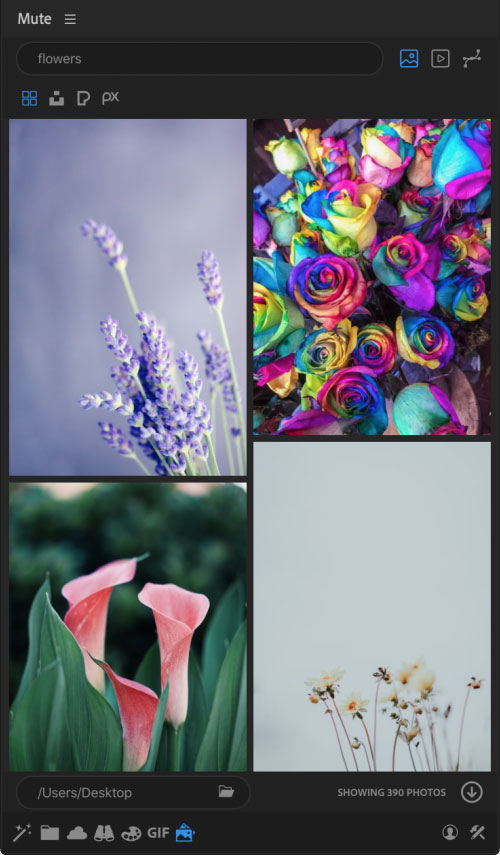
Media Library (V1.2.0)

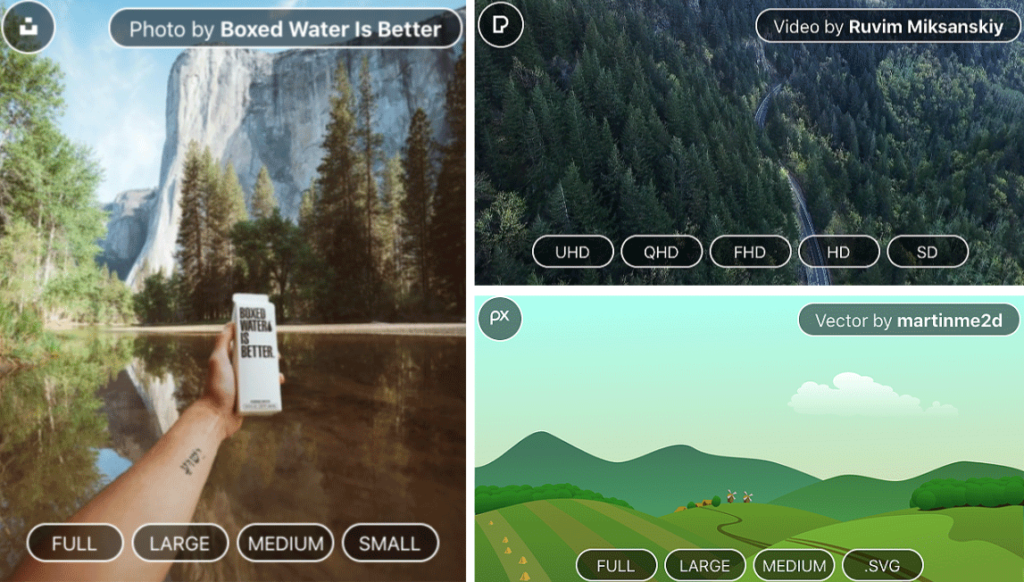
Download free images, videos and vectors from some of the best free stock asset providers. Media Library is available for After Effects, Premiere Pro, Photoshop and Illustrator.

  1. Type the assets you are looking for and hit the “Enter” key.
  2. By default, Photos are selected as the search category. You may change the search category as per requirement. You can change the category post search.

You can filter your search based on the provider.

Supported Providers:

Photos: Unsplash, Pexels, Pixabay

Videos: Pexels, Pixabay

Vectors: Pixabay

  1. Hover over the image, video, or vector preview to see the download option.
  2. Depending on the media type, you will see the available download options for the assets.
  3.  Click on the option you like to download. This will download the assets to your selected destination folder and import them to your project.
  4.  For After Effects, if any composition is selected, assets will be added to the composition. For Photoshop and Illustrator, assets will be imported as a new document as well as will be added to the working document. For Premiere, it will be imported to your asset panel.
  5. The SVG file is not supported by After Effects and Premiere Pro. They will be imported as PDF in After Effects and as PNG in Premiere Pro. Make sure “rsvg-convert” is not being blocked by Mac Security & Privacy or Antivirus Program on windows.

  1. Click the folder icon to set the destination folder for the assets.
  2. Click on the arrow icon to load more media. This icon will be available only once you reach the end of the current list of assets and when more assets are available.

Most of the supported providers allow using the photos, videos, or vectors for commercial use without giving attribution. But you must check the individual provider’s license agreement to avoid any legal complications. Mographfactory or Mute can not be held responsible for any copyright issue or legal complications if arrives.

Unsplash License: https://unsplash.com/license

Pexels License: https://www.pexels.com/license/

Pixabay License: https://pixabay.com/service/license/

Humaaans License: https://www.humaaans.com/

Open Doodles License: https://opendoodles.com/about

Open Peeps License: https://www.openpeeps.com/

Bootstrap License: https://getbootstrap.com/docs/4.0/about/license/

OpenMoji License: https://openmoji.org/faq/

Devicon License: https://devicon.dev/

Feather Icon License: https://github.com/feathericons/feather/blob/master/LICENSE

Ion Icons: https://github.com/ionic-team/ionicons

Weather Icons: https://erikflowers.github.io/weather-icons/

Remix Icons: https://github.com/Remix-Design/remixicon#usage

Material Icons: https://github.com/google/material-design-icons/blob/master/LICENSE

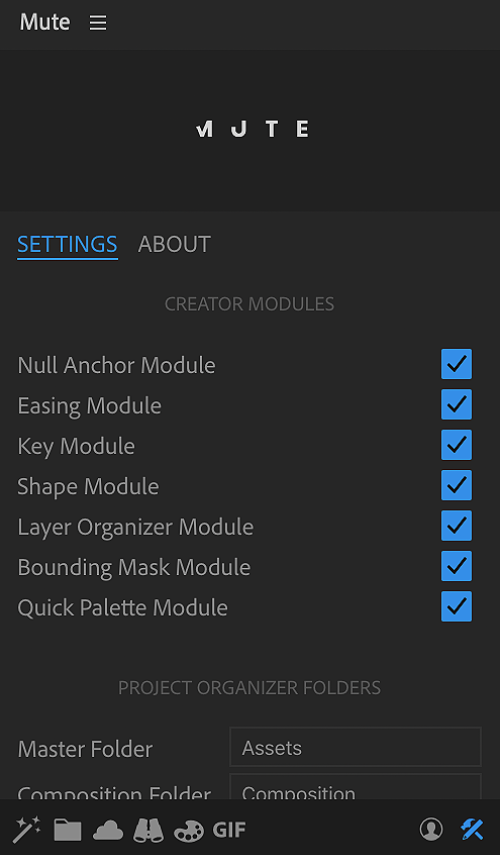
Settings

Mange your Mute options

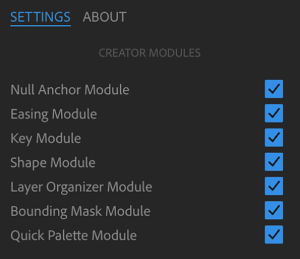
Creator Modules

Choose what modules to show when Mute starts up.

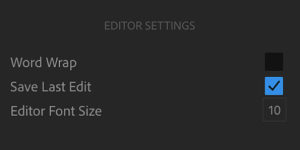
Editor Settings

Word Wrap: Turn on the Word Wrap for the code editor.

Save Last Edit: Save the last edited version of your expression or script on the Inspector screen editor. So you can start from wherever you left.

Editor Font Size:  Set the font size for the code editor.

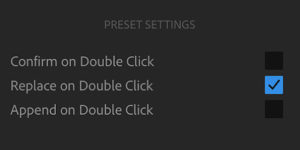
Preset Settings

Set the behavior of double click on the Expression presets. The defaults is “Confirm on Double Click“.

Confirm on Double Click: This will ask for confirmation while replacing the expression if an expression is already applied to the selected properties.

Replace on Double Click: This will replace the existing expression of the properties and won’t ask for confirmation. This can also be achieved by Alt+DoubleClick on the expression.

Append on Double Click: This will append the selected expression to the existing expression of the properties. This can also be achieved by Shift+DoubleClick on the expression.

Project Organizer Folders

Customize the predefined name of the Project organizers folder names.